SQL 2014 Availability Group with Windows 2016 Cloud Witness
What this guide covers
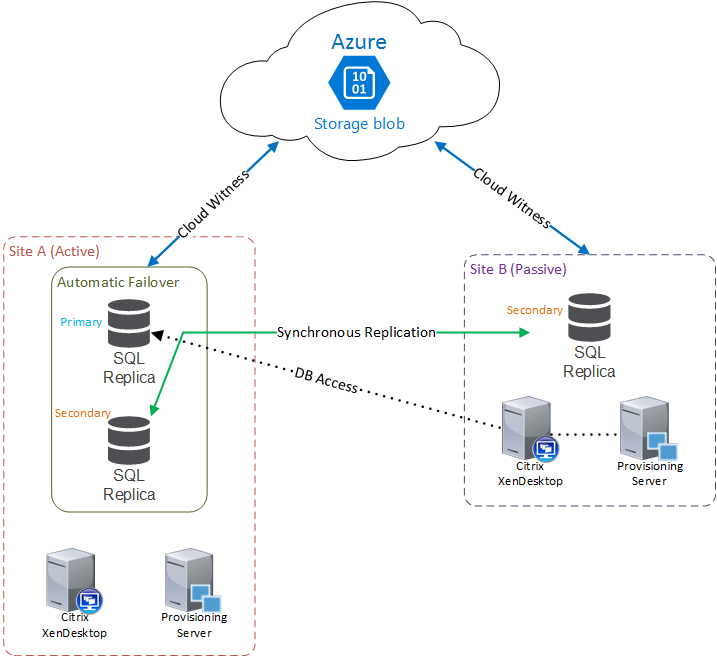
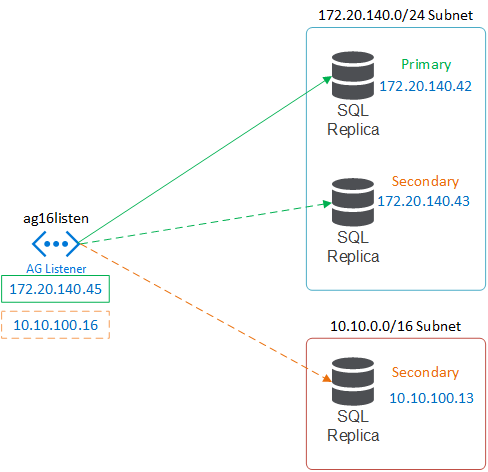
This configuration will include 3 SQL replicas across two sites\subnets. 2 will be located in the primary location where ‘automatic failover’ will be configured. This will allow the primary node to automatically fail over to the secondary node at the primary site much like a mirror does. The third node will reside in the secondary location in the case of site failure and will require a manual failover.
Introducing Cloud Witness
In today’s world most enterprises leverage a secondary site for disaster recovery in some fashion and believe it should be a no-brainer for SQL as well. With SQL mirroring, this was relatively simple by splitting the mirror and the SQL witness across the two locations for a quick DR configuration. But, in the last couple of years Microsoft has been pushing users to SQL availability groups that would piggy-back off of Windows failover clustering.
Windows clustering is much different from mirroring since it utilizes a quorum to keep the cluster up and running vs a dedicated witness server. If the cluster loses enough members it will stop, causing SQL to stop running accross all nodes. In a single site scenario this would be fairly easy to protect by adding a fileshare witness that would allow for a single node failure. The big limitation came in when adding a second site since the fileshare would live in one of the two physical sites. And in a quorum configuration, if the site that included the fileshare witness would go down it would bring the entire cluster down!
To protect quorum the fileshare needs to reside in a third location which many enterprises don’t have readily available. One possibility is to use the cloud to host the fileshare but this would require infrastructure such as a VPN tunnel back to the provider. This requires a lot of planning and work for a tiny file but extremely critical to keep the DB up an running. To resolve this headache Microsoft introduced ‘Cloud Witness’ in Server 2016 which allows the fileshare to reside in Azure, but without any of the other infrastructure. Just throw in the Azure API key and Server 2016 will take of the rest for you! No VPN needed! This guide will go over the steps to deploy a Windows Server 2016 failover cluster along with a SQL Enterprise 2014 availability group.
Requirements
- 3 Windows Standard or Datacenter 2016 Servers (2 will also work)
- SQL 2014 Enterprise (2 will also work)
- 2 IPs per subnet (For this guide you will need 4 in addition to the server IPs)
- Account that has access to create computer objects and modify domain permissions
- Azure access
- Service account to run SQL
Configure Azure Access
To create the cloud witness an Azure account and API key is required.
- Login to your Azure portal
- Create a new ‘storage account’. Feel free to adjust to reflect environment.
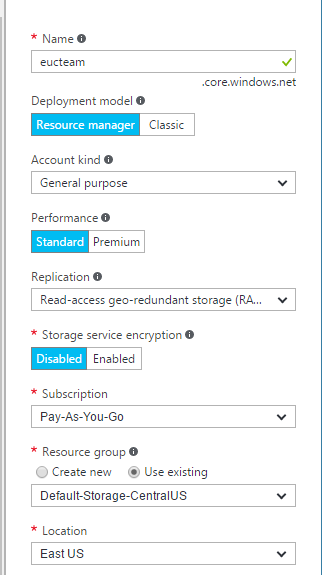
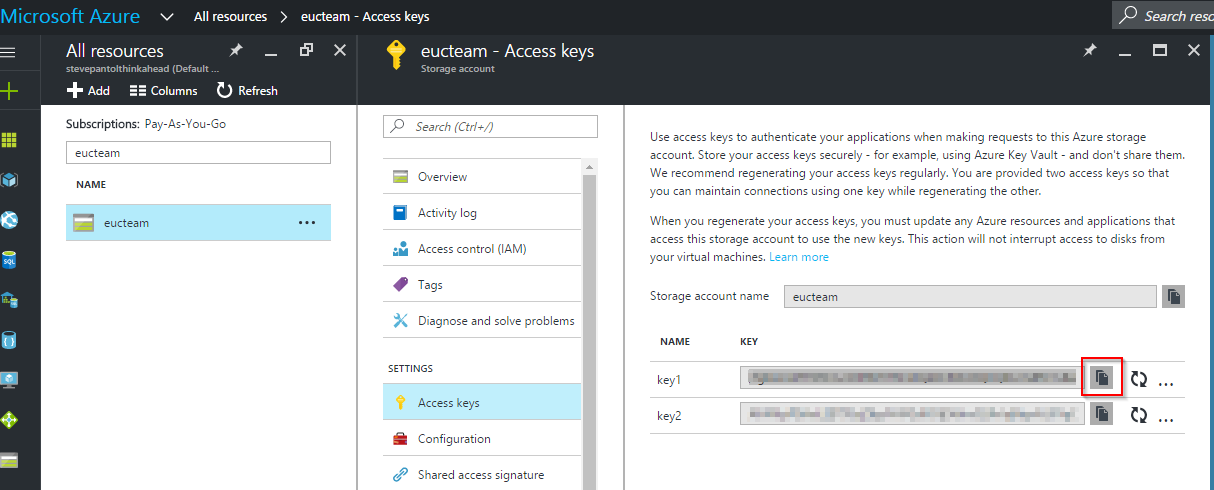
- After the account is created copy the API key needed for the next steps
Feature Install
- Let’s start with installing the necessary features on each of the Windows 2016 servers
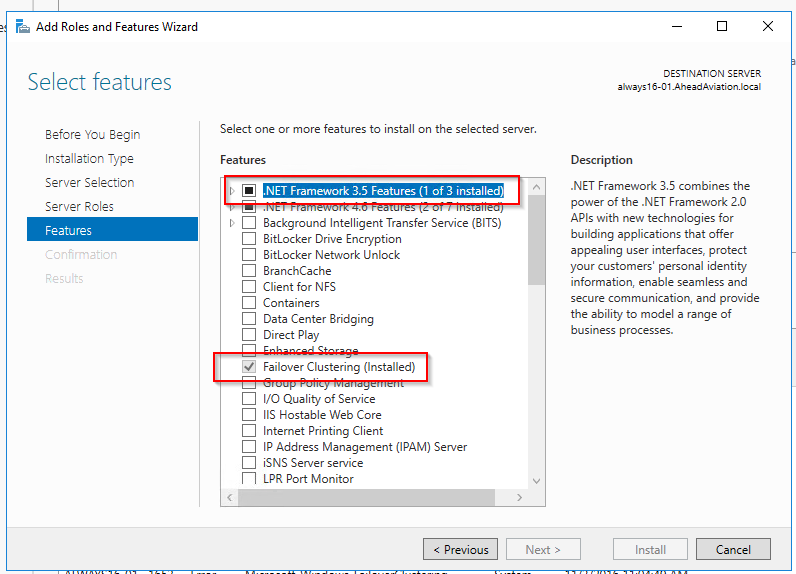
- Repeat this process on each server node
Create Cluster
- Log on to the first node with domain admin or an account that has access to create computer objects
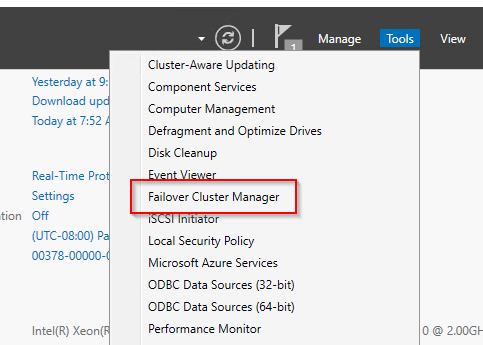
- From server manager launch the newly installed ‘Failover Cluster Manager’
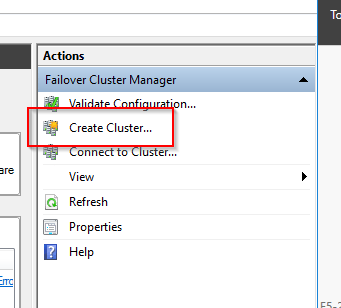
- Select ‘Create Cluster’
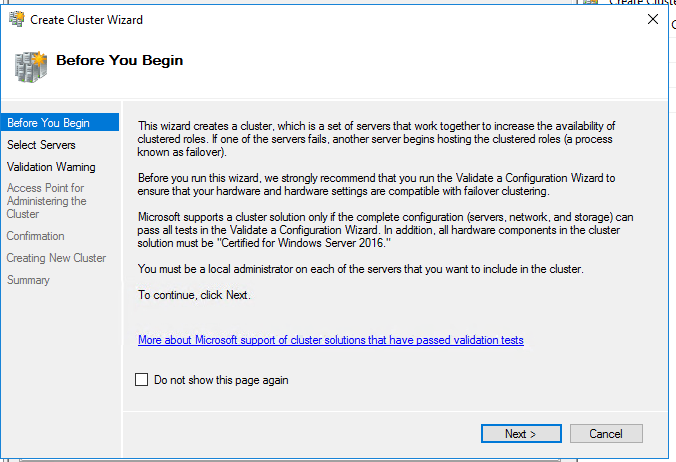
- The wizard will now run
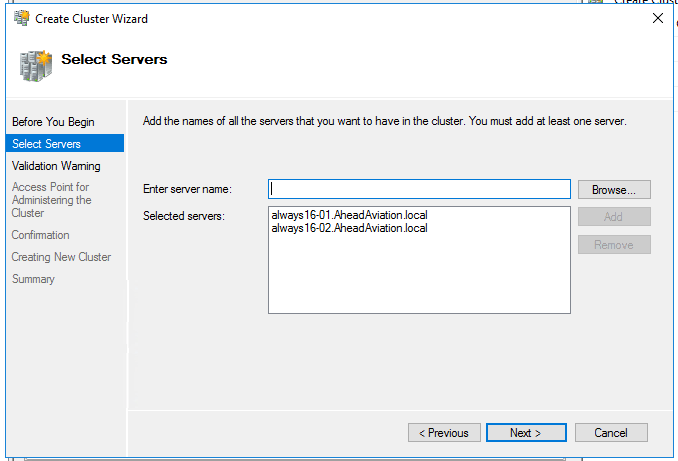
- Enter the names of the nodes that you would like to participate. In the screenshot only two nodes are added but feel free to add the third. (I go over adding additional nodes in a later section)
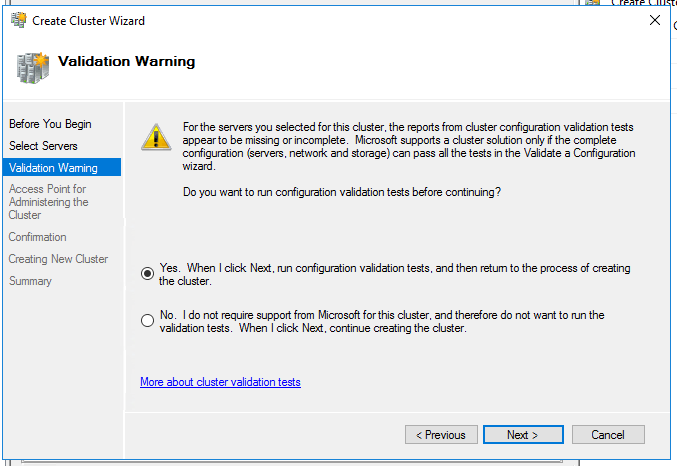
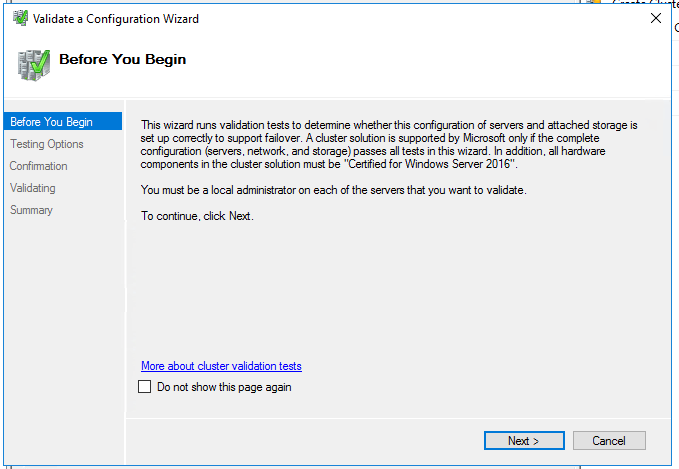
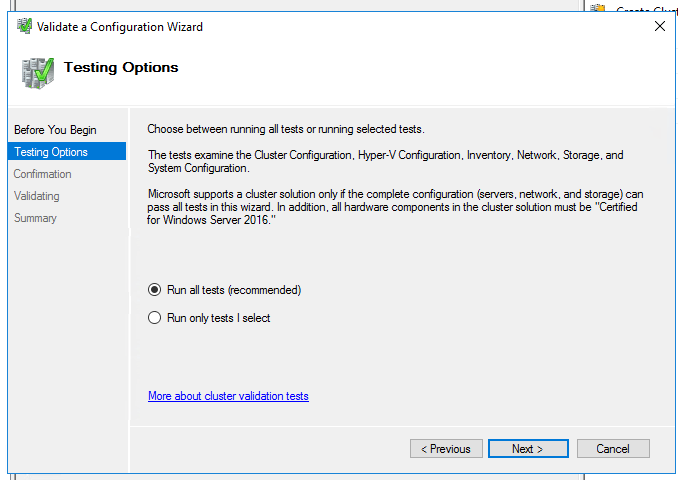
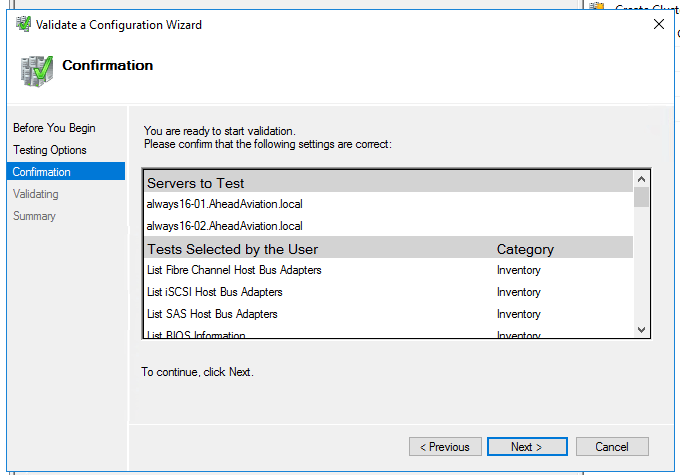
- Run through the validation tests
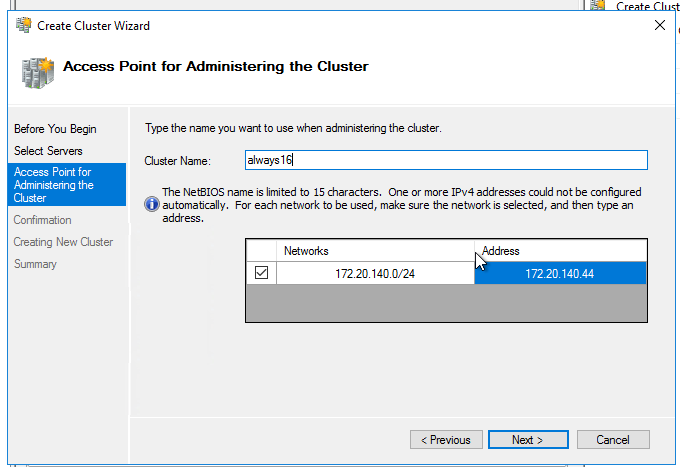
- Enter an IP address that the cluster will use for each subnet. And choose a name for the cluster (this will create a computer object).
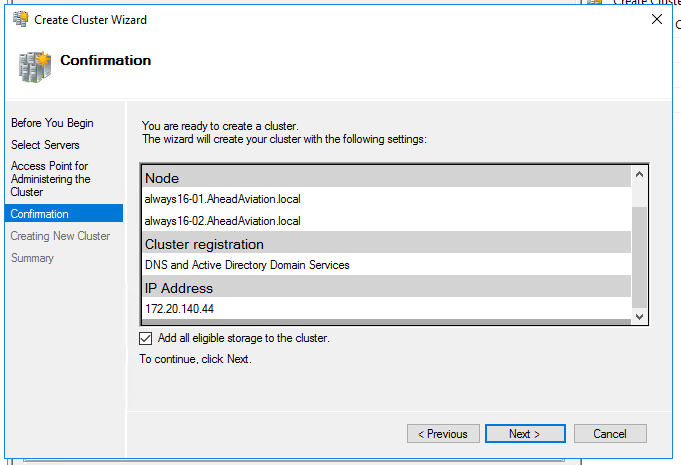
- Continue to hit next and verify there are no errors.
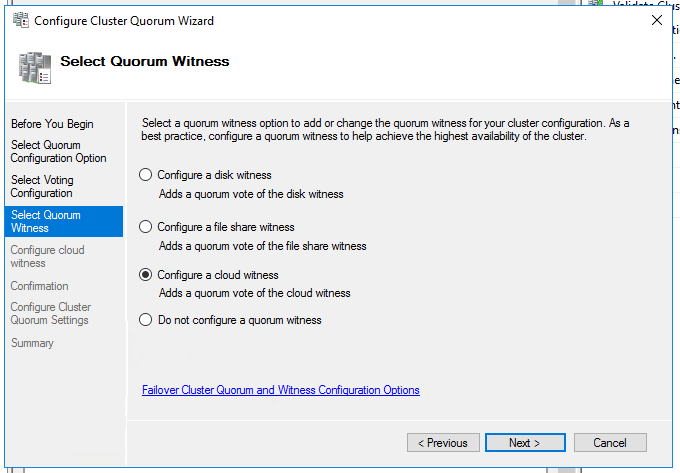
Create Cloud Witness
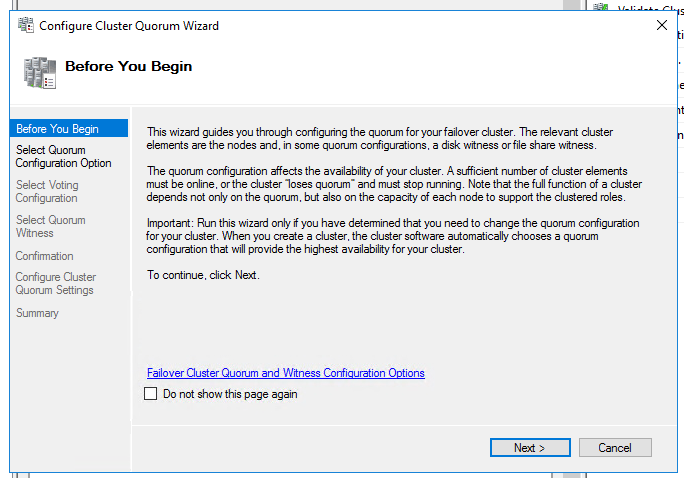
- From ‘Failover Cluster manager’ launch ‘Configure Cluster Quorum Settings…’

- The configuration wizard will start
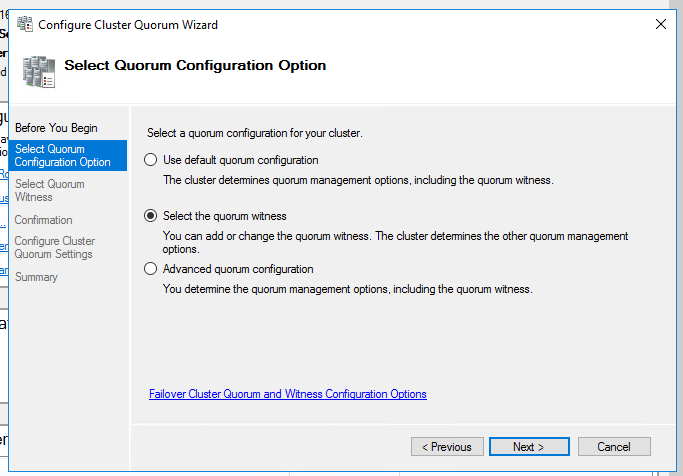
- ‘Select the quorum witness’
- Configure a cloud witness
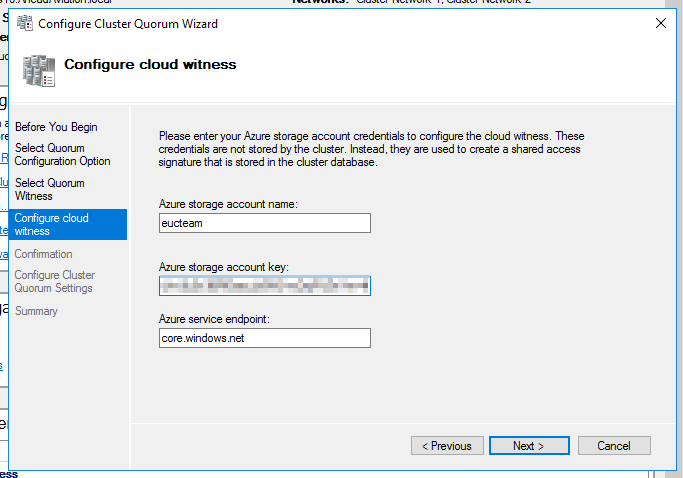
- Enter in the Azure account name and API key
- Select next to finish the wizard
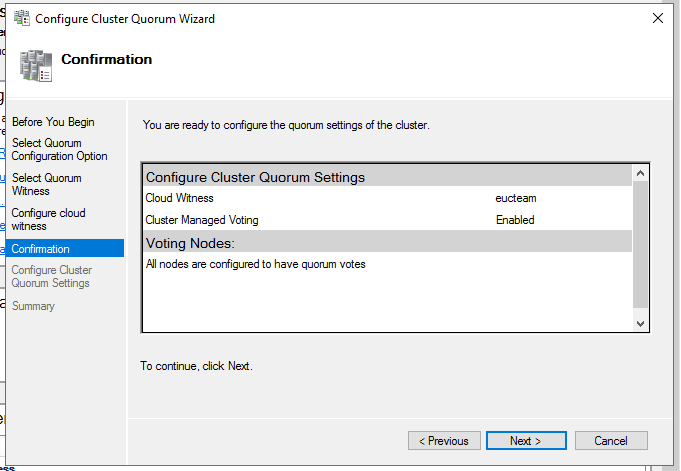
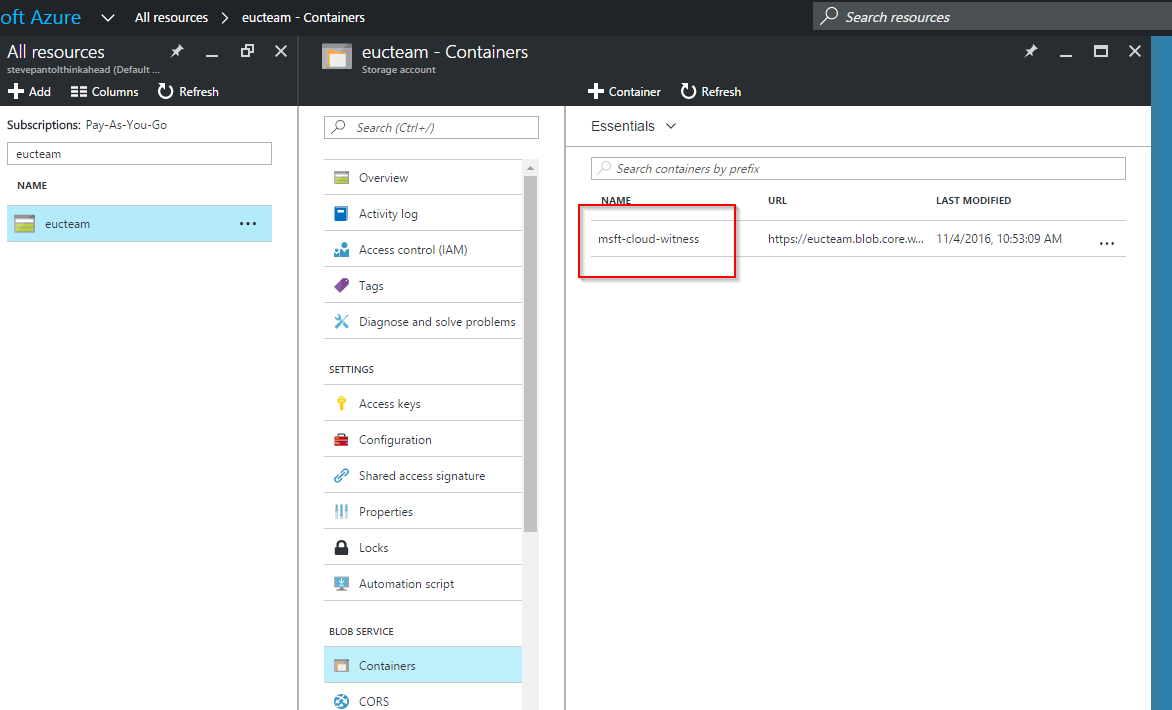
- Cluster is now configured! You should see a new container within Azure.
Install SQL 2014
SQL needs to be installed on each Windows 2016 Server
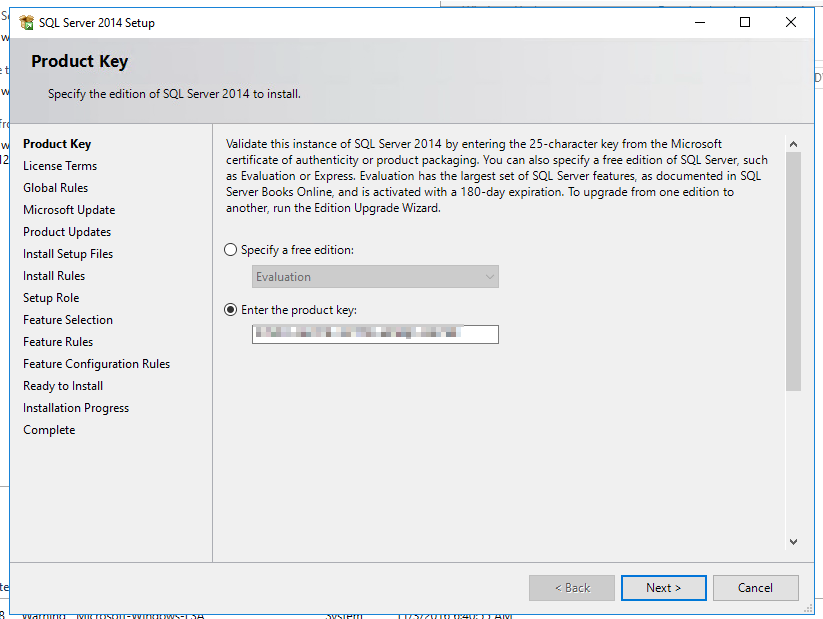
- Start the SQL 2014 Enterprise installer
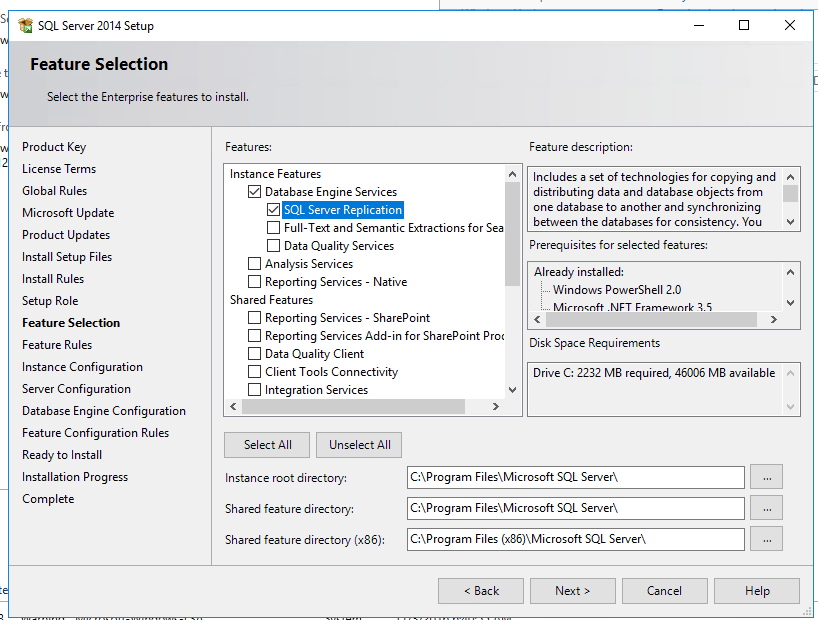
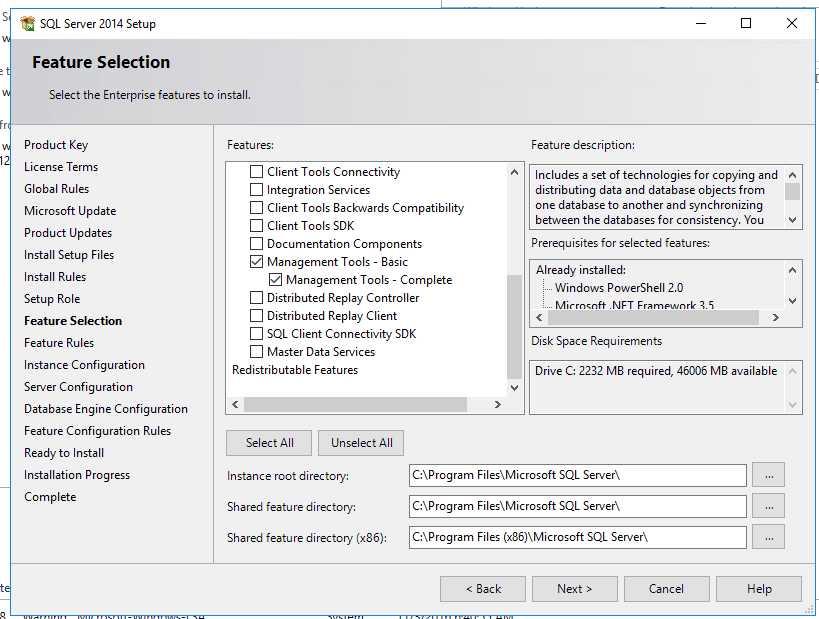
- Most of the screens can be continued through. On the feature selection select ‘SQL Server Replication’ and management tools
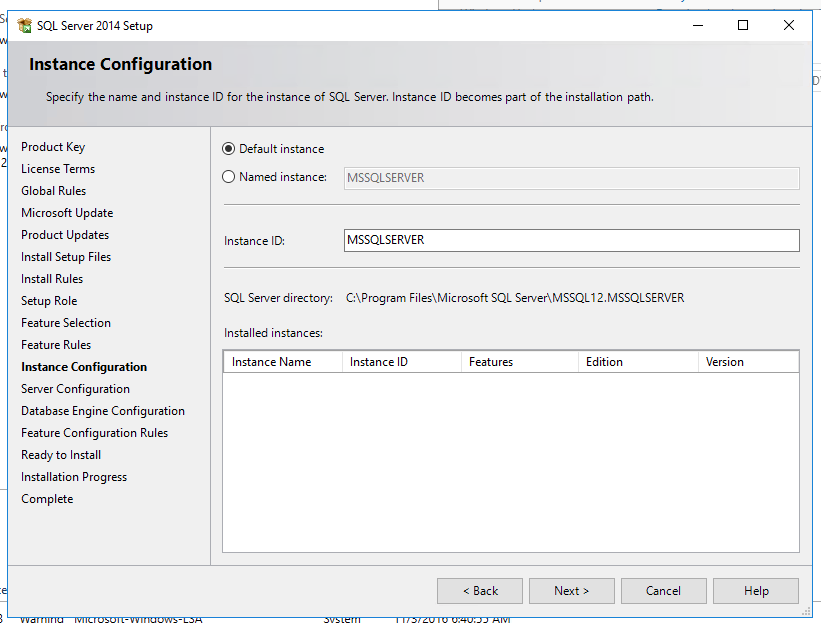
- Feel free to change the instance or leave default
- Configure the service account to run SQL along with adjusting service startup option

- Configure SQL access. I chose mixed mode.
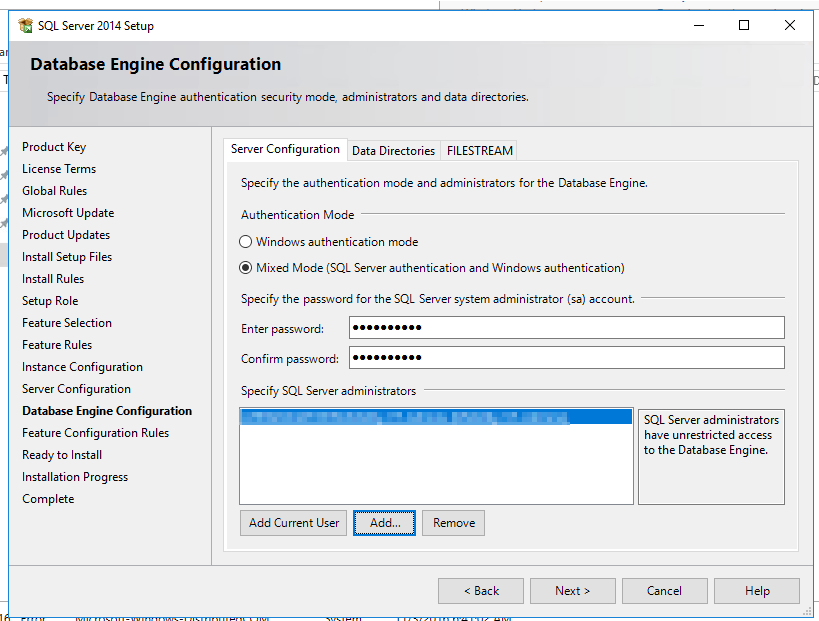
- Continue through the prompts
Configure SQL Service
Adjust the SQL instance so it can join the cluster.
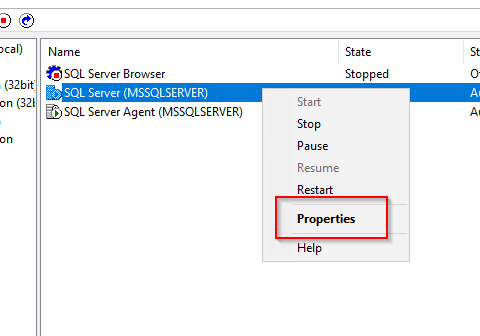
- Run ‘SQL Server 2014 Configuration’ from the start menu and select ‘SQL Server Services’
- View the properties of ‘SQL Server’
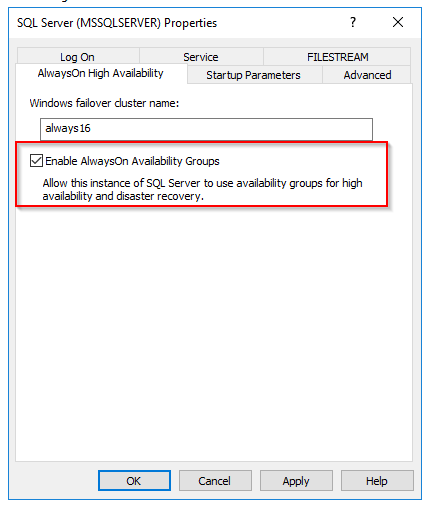
- Select the ‘AlwaysOn High Availabilty’ tab and place a check in ‘Enable ‘AlwaysOn Availability Groups’ and hit OK
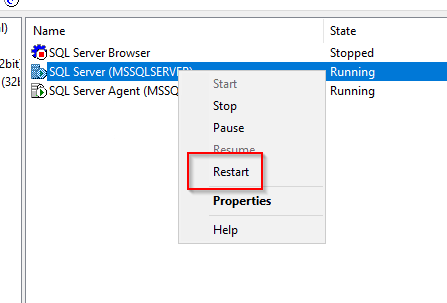
- Restart the SQL server service
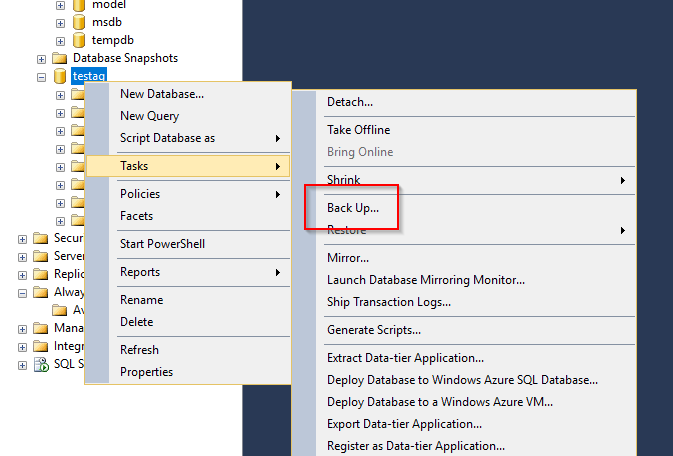
Create Database Backup
For this example I created a single database called ‘testag’ running only on the first node. A backup is required to place in a availability group.
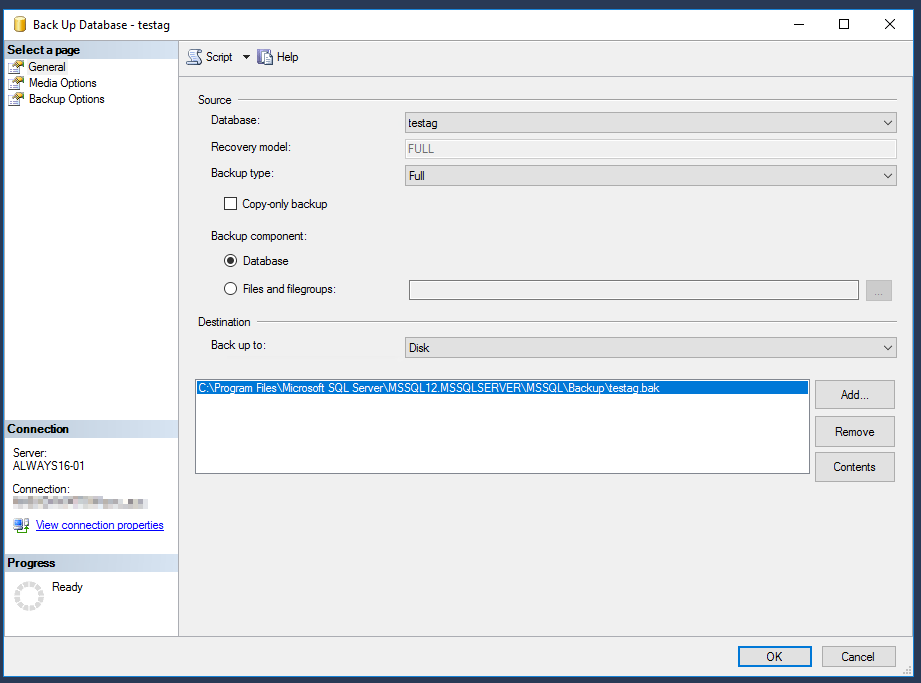
- Start the backup wizard on the database
- Run the backup with all defaults and location of your choice
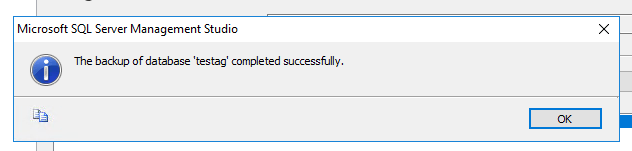
- Verify backup is complete
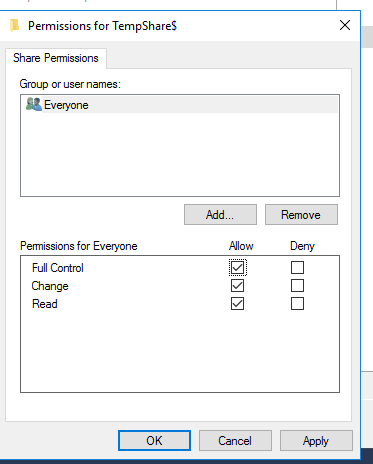
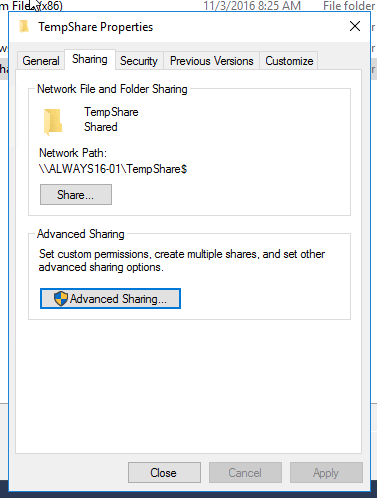
Create Temporary Windows Share
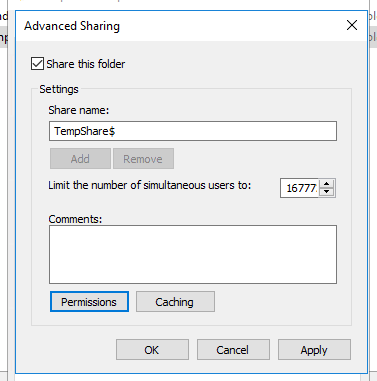
The availability group wizard needs a Windows share that is accessible to all nodes where it will copy the backup files needed while setting up the group. This share is only used when the group is created.
- Create a folder on the first node or use an existing path that will have access. I used ‘C:\TempShare’
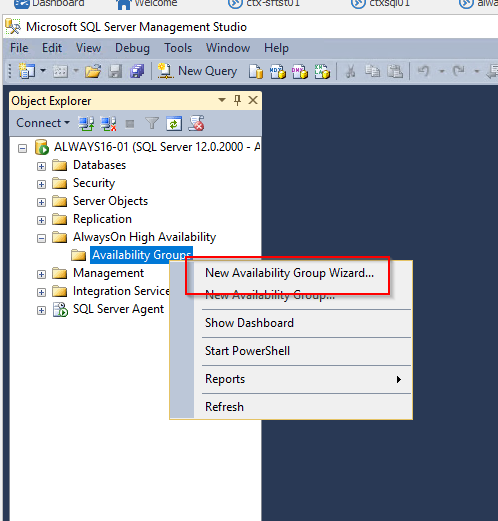
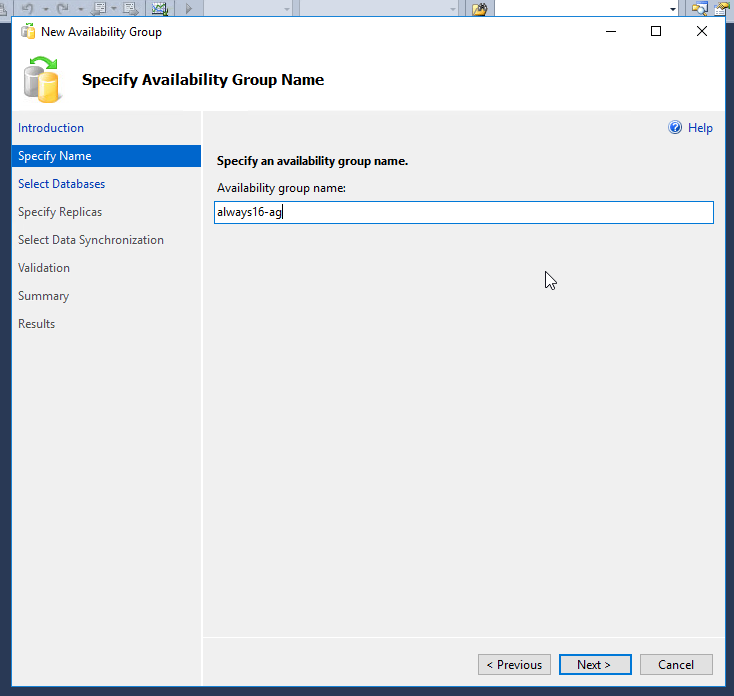
Create SQL 2014 Availability Group
- Run the ‘New Availability Group Wizard’
- Select the name for the availability group.
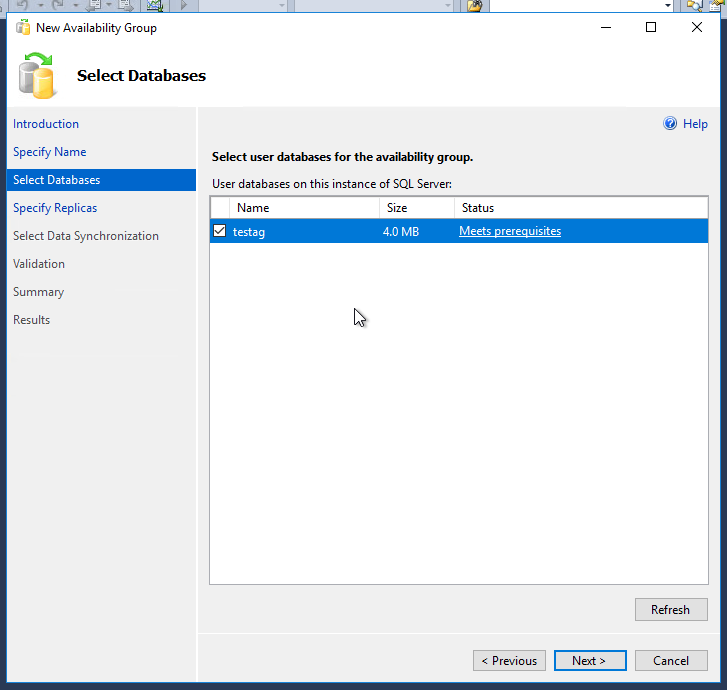
- Select the database to add to the group. (A backup must be created before this step.)
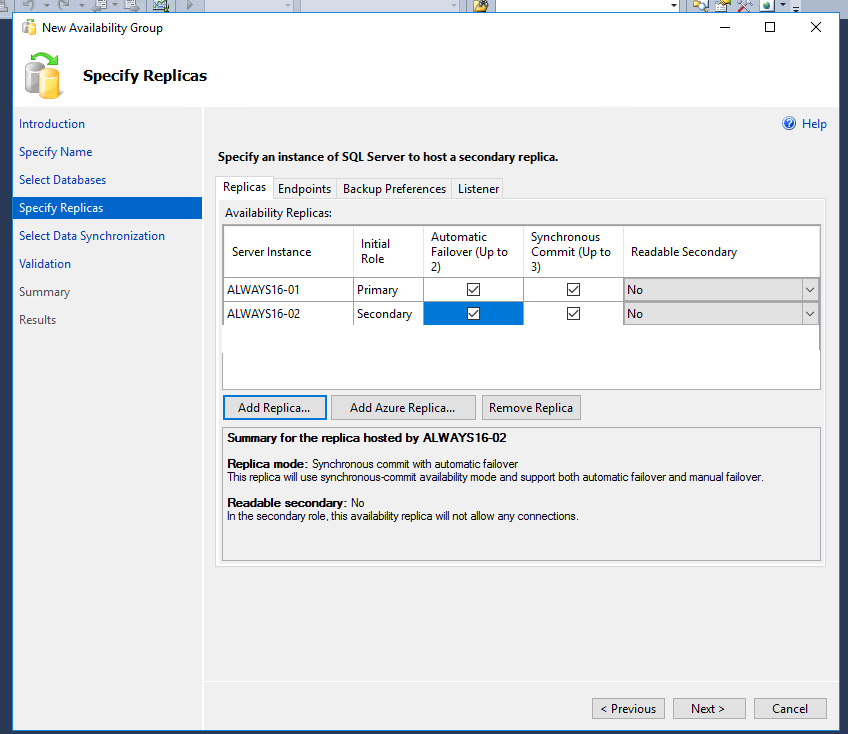
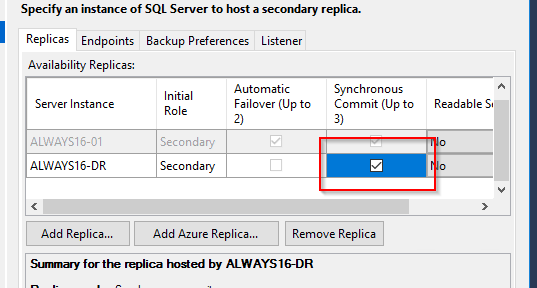
- Add replicas. In this case I only have two replicas but again feel free to add the third. Verify ‘Synchronous’ is selected.
-
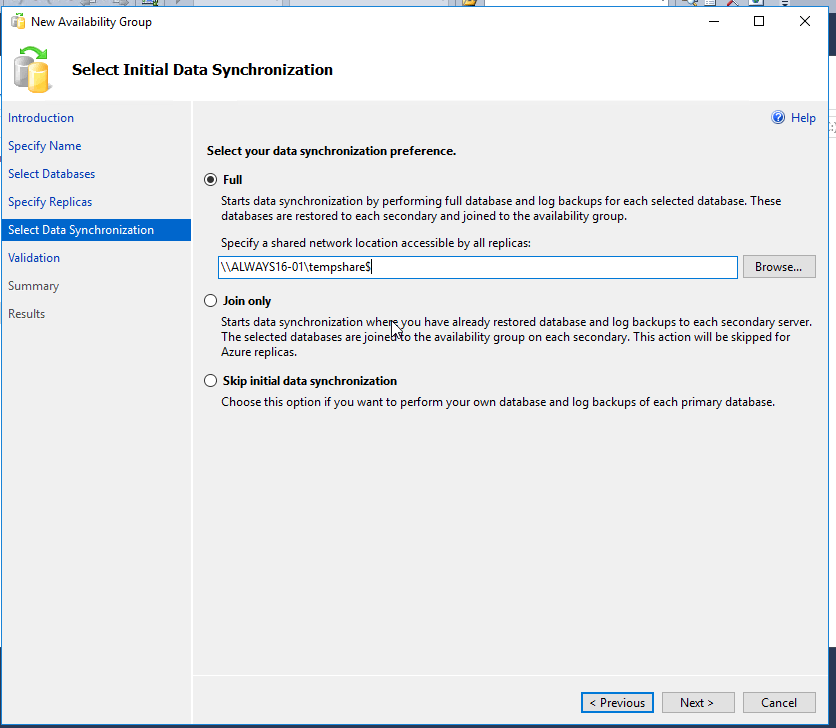
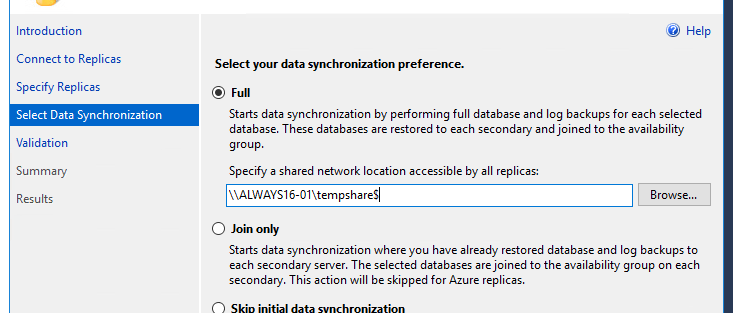
Select the share path created earlier
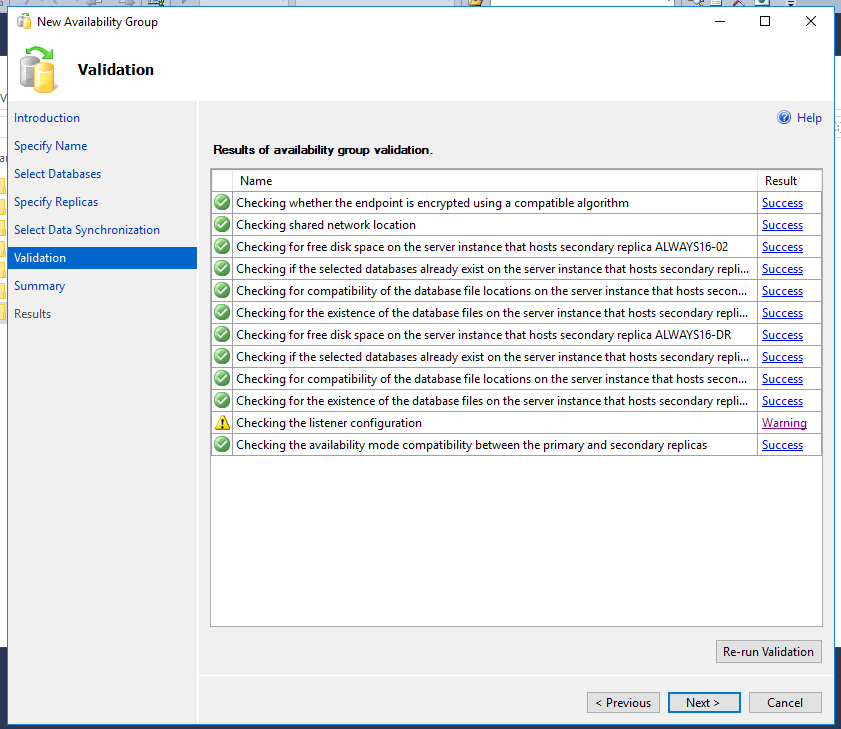
- AG will now create.
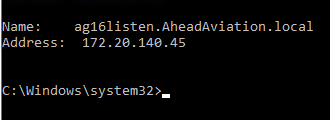
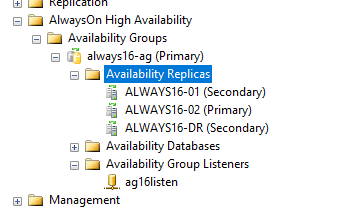
A listener is virtual object that allows connections to a database running on a node\replica of an availability group. The listener will dynamically point to the primary replica and is used in ODBC connections and connection strings of applications. A virtual IP will be required for each subnet used in the group In the example below ‘ag16listen’ is the configured listener with virtual IPs for each subnet.
Delegate Cluster account in AD
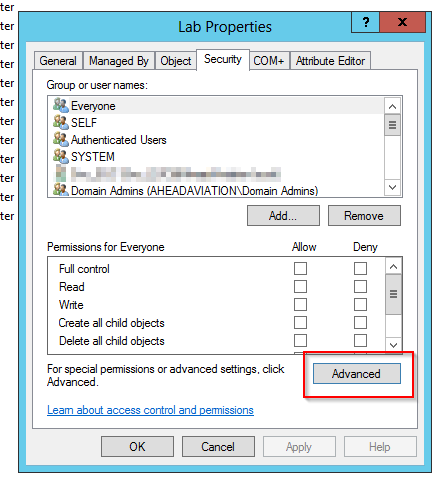
In order for the Availability group to create a listener computer object the cluster computer account needs rights to create computer objects.
- Locate the cluster computer object within AD. For this example ‘always16’ is the computer account located in the LAB OU.
- Right click on the OU and select security and then advanced. If this option is unavailable make sure ‘advanced features’ is enabled under the view menu.
- Select add to add the computer object
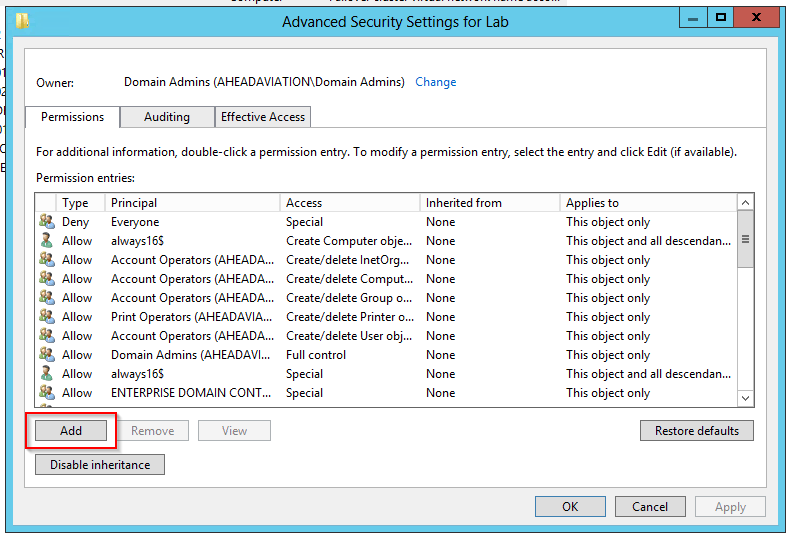
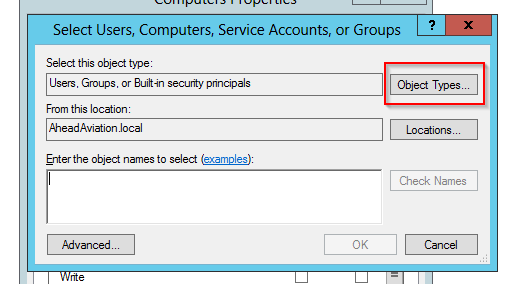
- Select a principal
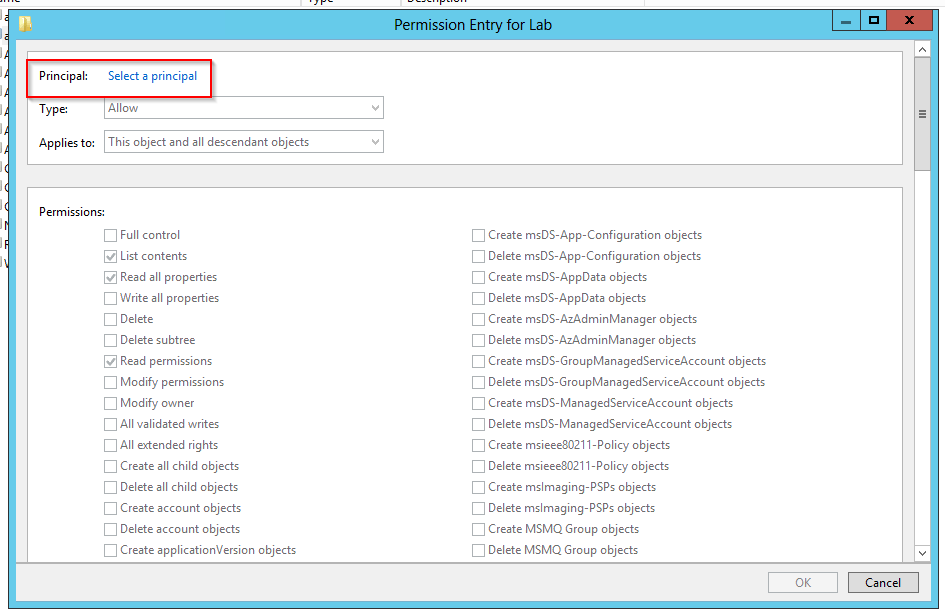
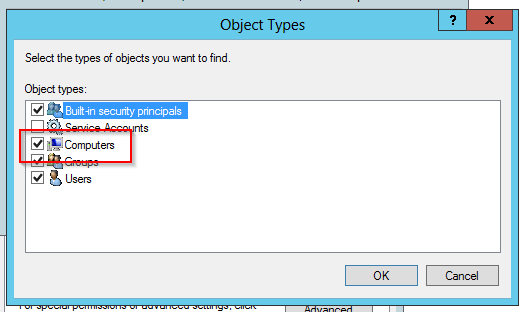
- Adjust the object types to look for computer accounts as well
- Select Computers
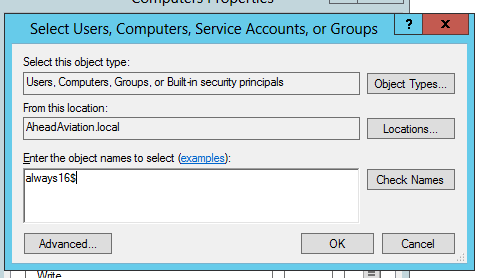
- Type in the name of the cluster created earlier. (‘$’ is used to lookup a computer account)
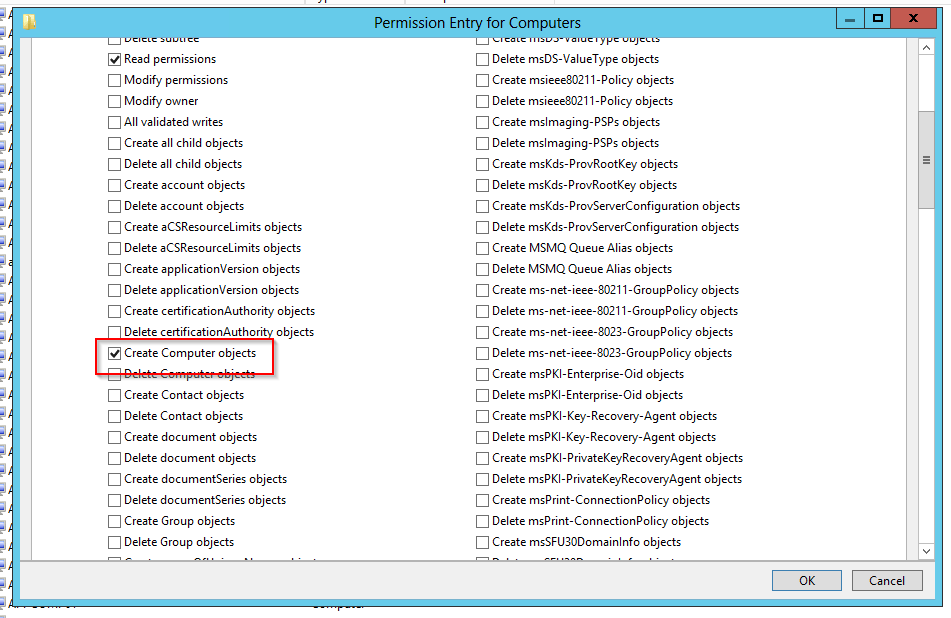
- Now edit the permissions of the computer account
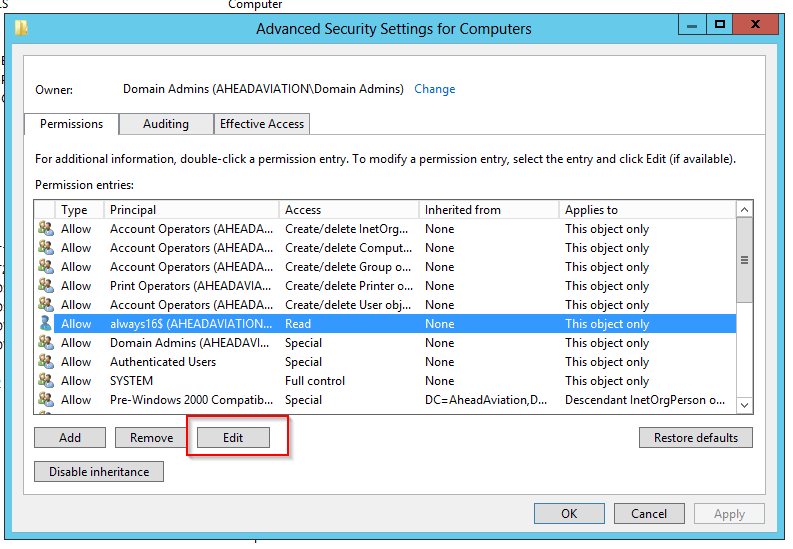
- Select ‘Create Computer Objects’ and keep all the other defaults
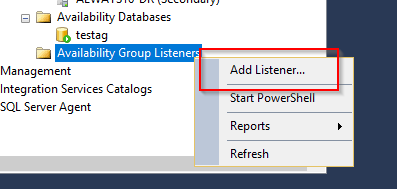
Create Availability Group Listener
- Within SQL managment studio on the primary replica, run ‘Add Listener’
- Enter the name you would like the computer object and DNS name of the listener to be (this will be created in AD)
- Add a unique IP address for each subnet and port.(Recommend sticking with the SQL default of 1433.)
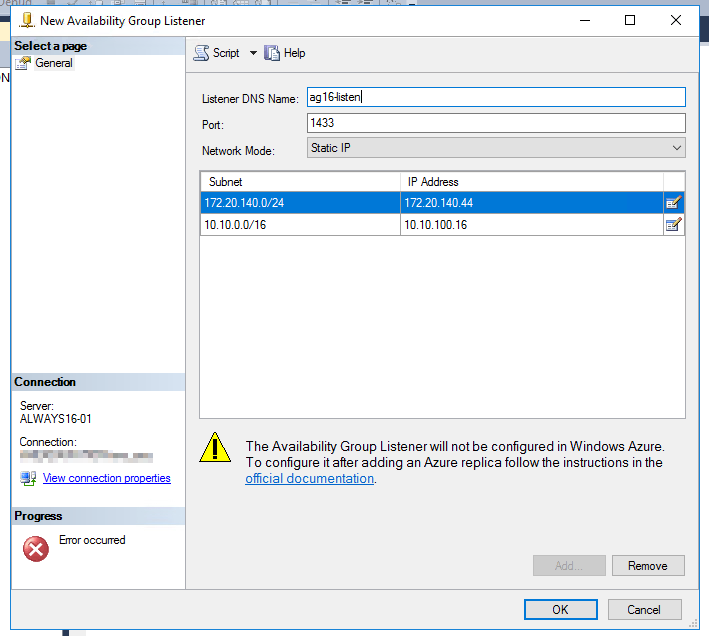
- Hit OK and verify the process runs correctly. Most of the issues encountered are around the AD delegation of the cluster computer account.
DNS Considerations
By default all subnet IPs will have a DNS entry created which is no problem for newer applications since modern ODBC drivers will be able to figure out what IP to connect with dynamically. However, this might cause issues for applications that utilize older connection methods. For example Citrix XenDesktop can utilize the more modern connection driver but until recently Provisioning Services (<7.11) would have issues when resolving to the secondary replica in the other subnet.
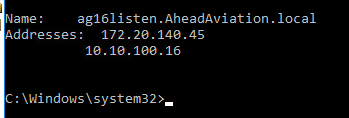
This is the current NSLOOKUP which shows each AG listener IP appearing and will cause a round robin lookup.
To resolve the round robin result we can run PowerShell commands to register only the ‘active’ subnet of the primary. And if a failover does occur it will register the new IP to DNS in the secondary subnet
-
First get the ‘network name’ needed
Get-ClusterResource | where {$_.resourcetype -eq 'Network Name'} </pre>
 -
Next run the following commands reflecting of the name discovered in the above command
Get-ClusterResource "always16-ag_ag16listen"|Set-ClusterParameter -Name HostRecordTTL -Value 5 Get-ClusterResource "always16-ag_ag16listen"|Set-ClusterParameter -Name RegisterAllProvidersIP -Value 0 Stop-ClusterResource "always16-ag_ag16listen" Start-ClusterResource "always16-ag_ag16listen" Get-ClusterResource "always16-ag_ag16listen" |Update-ClusterNetworkNameResource -
Verify NSLOOKUP and only 1 IP should appear
Follow these steps to add an additonal replica to your availablity group
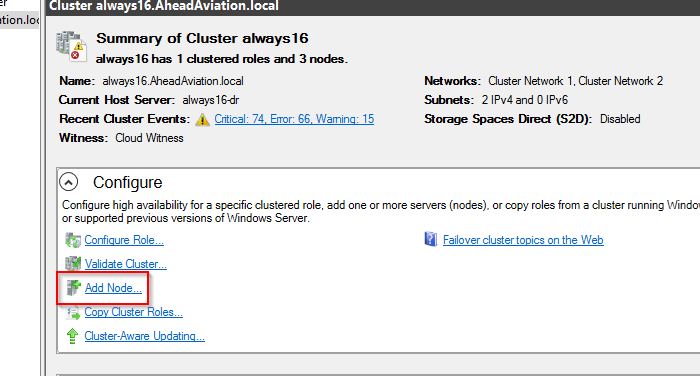
Add node to failover cluster
First need to add the additonal node to the failover cluster.
- Launch ‘failover cluster manager’ from the primary node. and select ‘Add Node’
- Enter the name of the additional node
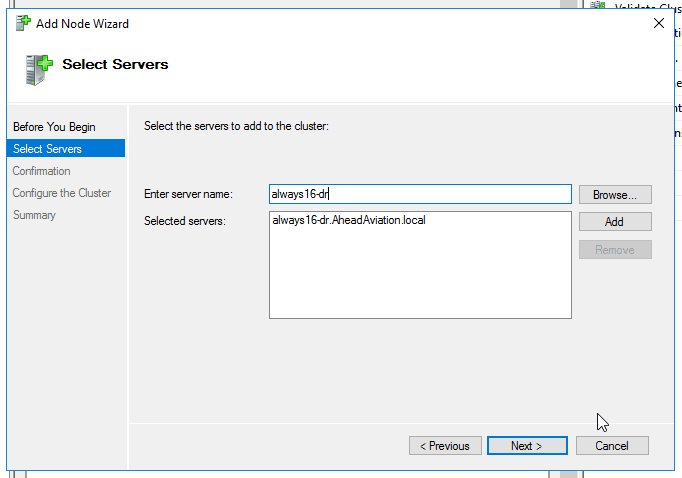
- Continue to hit ‘next’ and verify successful add
- If the additional node is in another subnet the cluster will need an IP in that new subnet so continue on. If the node is in the existing subnet skip to the “Add Replica to Availability Group” section.
- Go to properties of the cluster name under the ‘Cluster Core Resources’ section
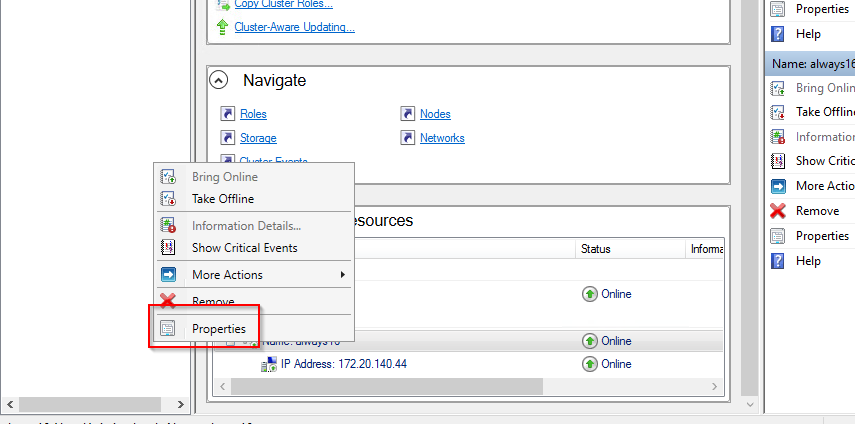
- Select ‘Add’
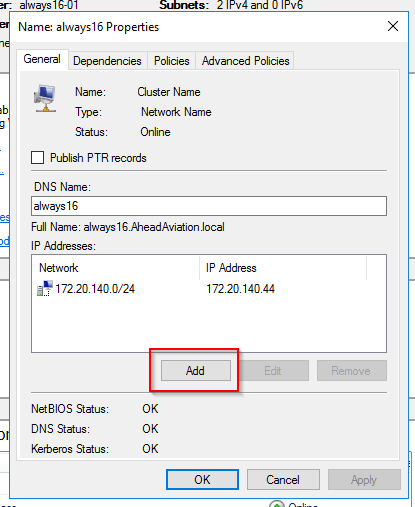
- Enter the IP in the new subnet
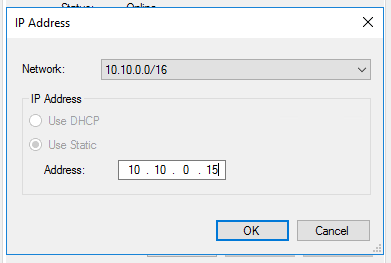
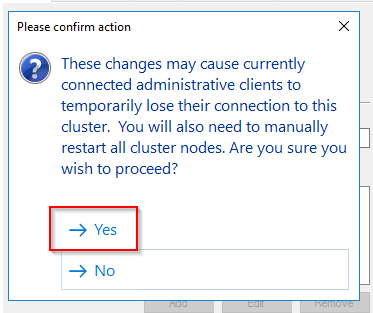
- Hit OK twice and agree to warning
Add Additonal Subnet IP to AG Listener
The IP from the new subnet must exist on the listener before adding to the AG
- From SQL studio right click on the ‘Availability Group Listener’
- Select ‘Add’
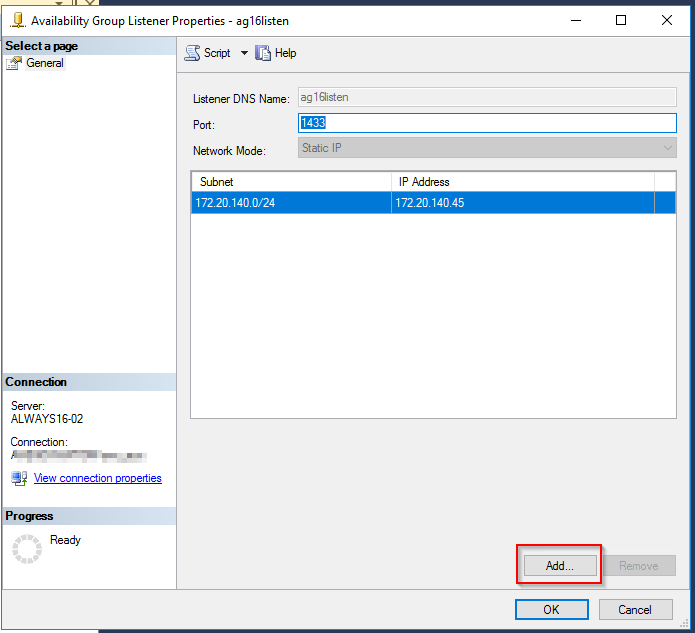
- Enter a unique IP in the new subnet of the node
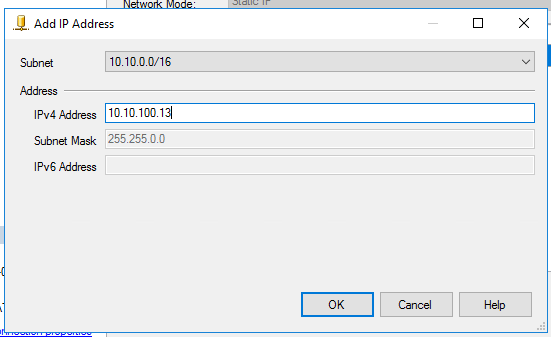
- Ht OK
Add Replica to Availability Group
Now that the listener is configured and server member of the cluster it can be added to the AG
- From SQL studio right click on the Availability Group and select properties
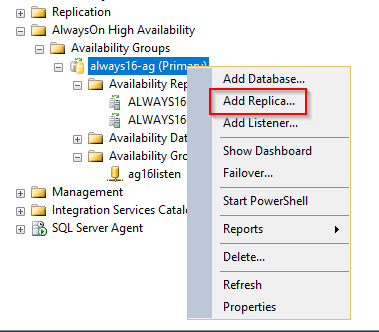
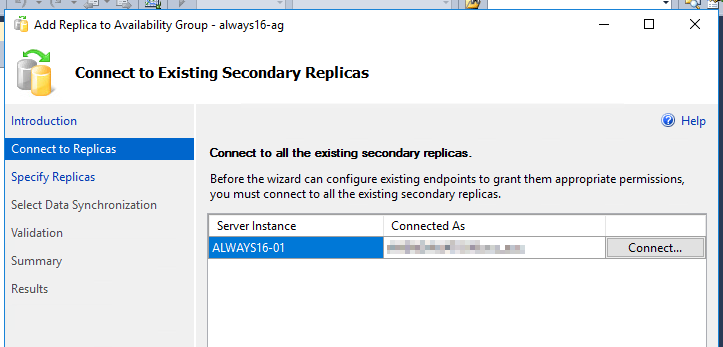
- Connect to the secondary replicas with service account and hit next
-
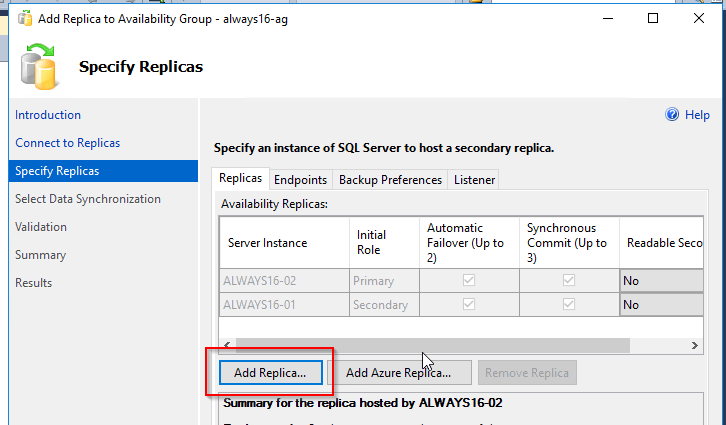
Select ‘Add Replica’
-
Enter in new replica server name and hit connect
- Select Synchronous
- Enter in the network share used earlier in the process
- Verify ‘validation’ process is successful
- Continue with any prompts
- Replica should now appear ‘Green’
Leave a comment